

With Windows 10, Microsoft has enabled auto enrollment during device start up. During initial boot device can be register into AAD and auto enrolled into WS1. There are 2 methods of doing this: Out Of the Box Experience and Autopilot. Both processes are very similar. OOBE is a basic process where user is taken through all steps and being asked for configuration input, where in Autopilot this is more automated and administrator can choose the settings for end user, therefore improving user experience. In this post I will be describing OOBE process and it’s requirements. For Autopilot, please refer to my other post.
You can find more information on OOBE under below URL on Microsoft website:
https://docs.microsoft.com/en-us/windows-hardware/customize/desktop/customize-oobe
Requirements
- Integration between WS1 and AAD
- Identity Services enabled in and configured in WS1
- MDM and MAM application configured in AAD
Integration between WS1 and AAD
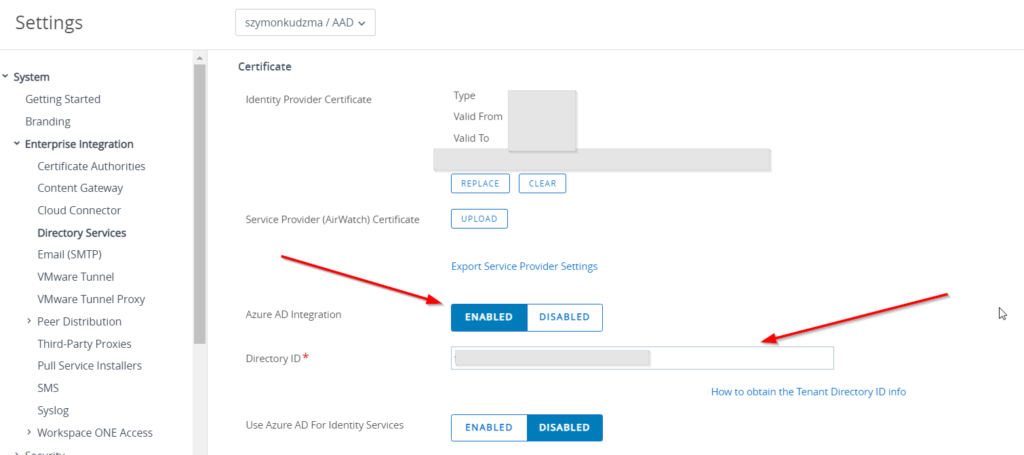
First step in order to enable OODE is the integration between AAD and WS1. This can be done in System Settings => System => Enterprise Integration => Directory Services
Select Enable next to Azure AD integration and type in Directory ID from AAD
Directory ID can be found in AAD service, withing overview tab
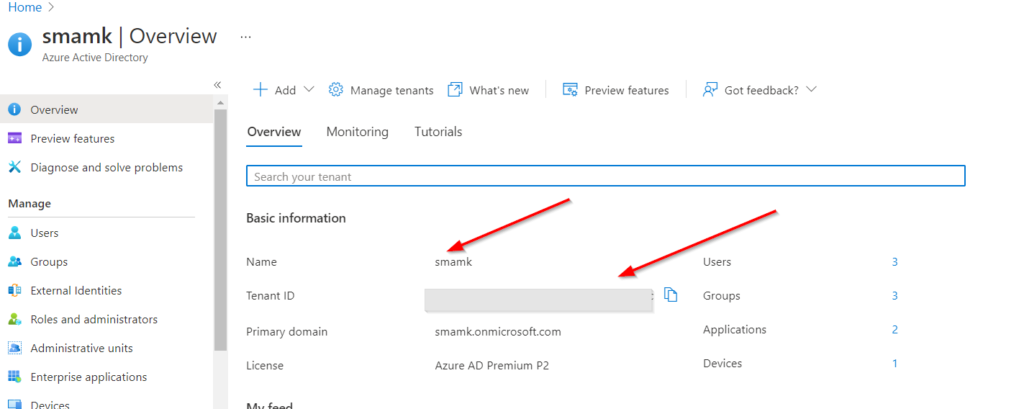
Please also note tenant name, which we would require in next step
Once tenant ID has been put in, press save in WS1 and done! First requirements is complete.
Identity Service configuration
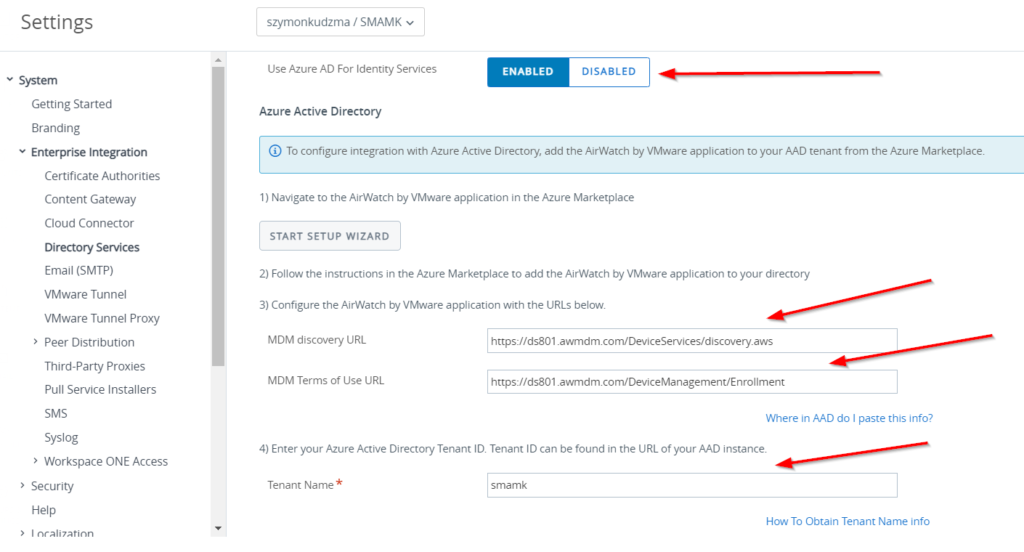
Second requirement for OOBE is Identity Services integration between WS1 and AAD. There are 2 parts of this. One is done in WS1, second in AAD.
In WS1 got to System Settings => System => Enterprise Integration => Directory Services, scroll down until you see “Use Azure AD for Identity Services” Select Enable. To set of URLs will be provided under point 3 which should then be used in AAD, copy that and save for next step. In point 4, type in Tenant name, which was captured in previous step while getting tenant id.
MDM and MAM configuration in AAD
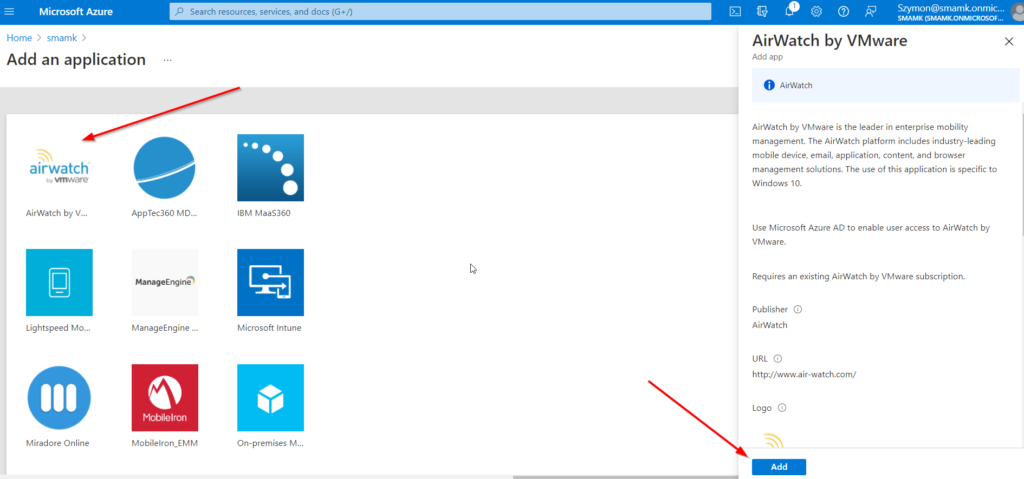
Final step is configuration in AAD. In Azure, navigate to AAD => Mobility (MDM and MAM). Then select Add application

In next screen chose Airwatch by VMware and then click Add
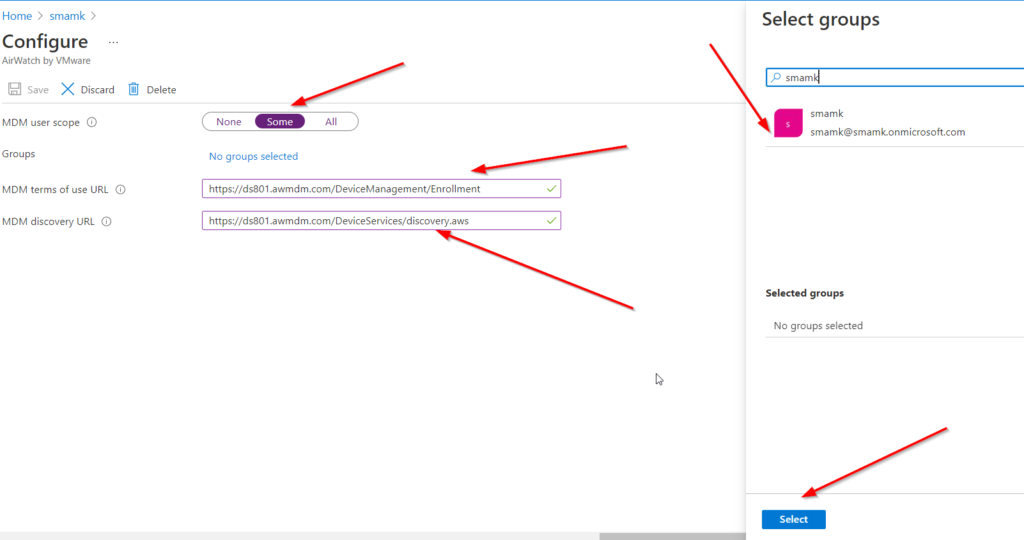
Once this is done, you now should see new application in the list under Mobility service. Select it and paste URLs provided in earlier step in WS1 – terms of use and discovery URL. In addition please do not forget about assigning users into that application. Only users assigned to this application will be able to use OOBE process. You can either select some users or users group, or select ALL if this is what is required. In my scenario below I’m only selecting one user for testing. Note: A test user group or a single user is recommended before applying to more users.
From this point new Win10 enrollments should go through OOBE process when user who is assigned to configured MDM application types in corporate email address during initial boot up.
Enjoy!